Assigning KNX PL-Link devices (online)
Once your KNX PL-Link device is configured, you can download and assign the device to match your online device.

If there is one engineered device and one device of the same type on the network, they automatically find each other and match.
Alternatively, enter the serial number of the devices in the offline data. After download, the device finds and configures the device automatically, if it is available on the network.
1. Assign a KNX PL-Link device
- The KNX PL-Link devices are configured.
- The device is connected.
Connect and disconnect
- Go to Building > Building Structure.
- Right-click a configured PXC4.. PXC5.. or PXC7.. and select Go to engineering.
- Open the KNX PL-Link task.
- Click Play
 .
. - An orange frame around the KNX PL-Link area becomes visible.
- In the KNX PL-Link area, select the KNX PL-Link device network.
- In the KNX PL-Link bus table, click Assign.
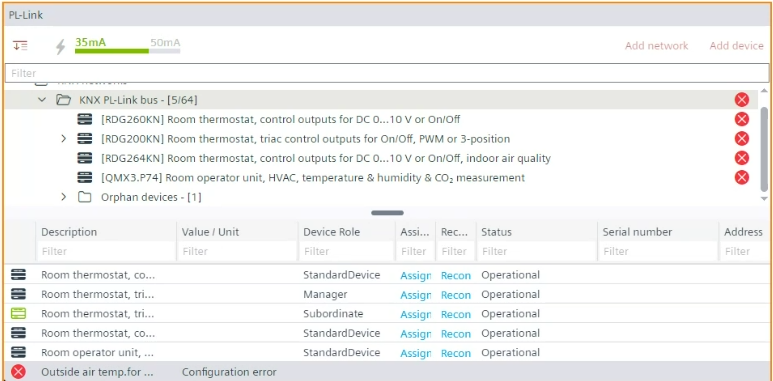
- On the corresponding device, press the pin. This is dependent on the used hardware.
- Check the hardware documentation for information on putting the room operator unit into programming mode.
- ABT Site starts downloading the configuration to the device.
- Once the configuration is finished, the status l changes to Operational.
- The KNX PL-Link device is assigned and the configuration loaded. Reset triggers a reconfiguration of the assigned device.
- When online, the tool shows all unassigned devices available on the network in the Orphan devices list.
2. Read back the serial number
This step must be carried out in order to read back the serial number to the project.
- The device is connected.
Connecting to devices
- Go to Startup.
- Open the Configure and download task.
- Select the Discovered devices tab.
- Right-click the device and select Upload.
- The device serial number is uploaded to the project.