Configuring a RDG2 window contact or/and presence detector
In order for the window contact or presence detector to be displayed on the RDG2 device, the corresponding parameters must be set accordingly. In a further step, the control program must be connected to the window contact and the presence detector contact.
Configure a window contact
- A RDG2 KNX PL-Link device is added.
- In the KNX PL-Link area, select the device.
- Select the Configuration tab on the right.
- The Configuration view shows the properties of the selected device feature.
- In the Name column, select Inputs > P153: Input 2.
- In the drop-down list, select Window contact.
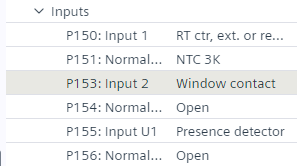
- In the Name column, select Inputs > P154: Normal position and sensor, input 2.
- In the drop-down list, select Open or Closed.
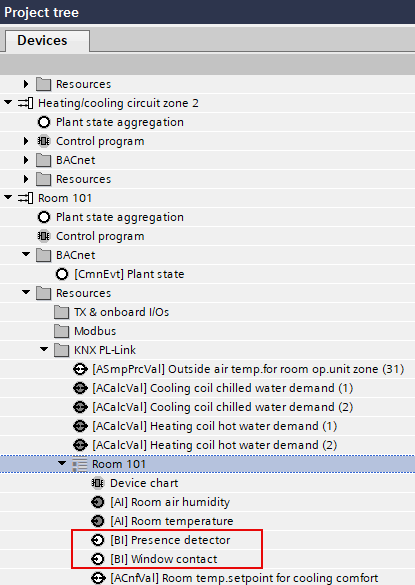
- As soon as the window contact is activated, ABT Site creates a corresponding window contact BACnet object in the Programming editor.
Configure a presence detector contact
- A RDG2 KNX PL-Link device is added.
- In the KNX PL-Link area, select the device.
- Select the Configuration tab on the right.
- The Configuration view shows the properties of the selected device feature.
- In the Name column, select Inputs > P155: Input U1.
- In the drop-down list, select Presence detector.
- In the Name column, select Inputs > P156: Normal position and sensor, input U1.
- In the drop-down list, select Open or Closed.
- As soon as the window contact is activated, ABT Site creates a corresponding presence detector contact BACnet object in the Programming editor.
- Adapt the device chart for the window contact or/and presence detector.
Adapting the RDG2 device chart with the window/presence detector contact