Configuring a network connection
The commissioning laptop requires a unique IP address in the IP network.
In addition, the commissioning laptop and the IP devices (room automation station, router, etc.) must be located in the same subnet for ABT Site to detect a device using UDP Multicast. For example:
192.168.251.10, Subnet mask 255.255.255.0
192.168.251.20, Subnet mask 255.255.255.0
The network connection of the commissioning laptop must be configured accordingly. Automatic IP address assignment by a DHCP server does not satisfy this requirement.

The existing IP address with subnet mask is key for configured IP devices.
The IP address with subnet mask (target address) to be configured is key for unconfigured IP devices. This ensures that all devices are located in the same subnet following configuration.
In ABT Site, network connection settings can be queried directly via the Connect button in the common toolbar.
These settings can be accessed via the Network and Sharing Center in the Windows 10 operating system.
Configure the commissioning laptop network connection
- The IP address with subnet mask is known for the commissioning laptop (ask your project manager).
- Select Start > Settings > Status > Network and Sharing Center > Change adapter settings > Local Area Connection 2.
- The Local Area Connection 2 Status dialog box displays.
- Click Properties.
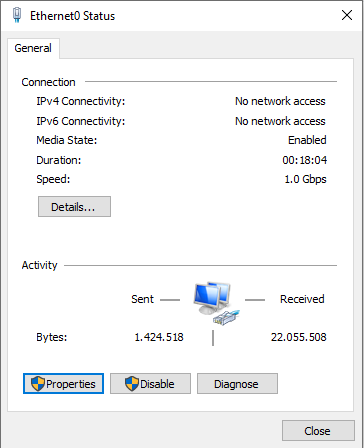
- Select Internet Protocol Version 4 (TCP/IPv4).
Click Properties.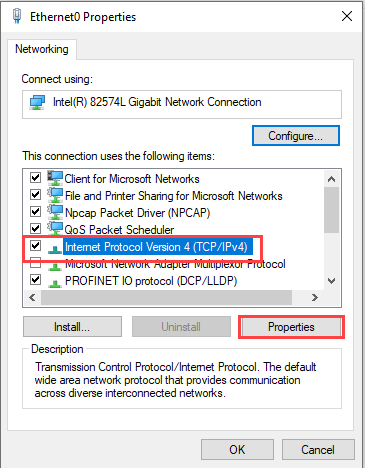
- Select Use the following IP address.
Click Advanced.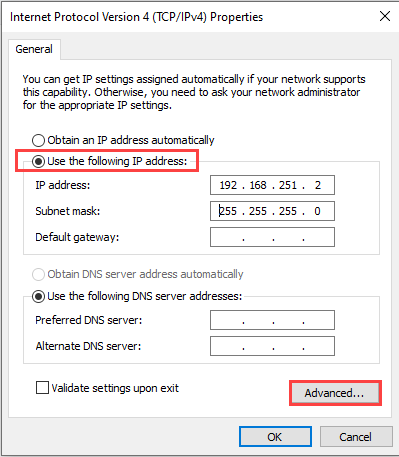
- Click Add.
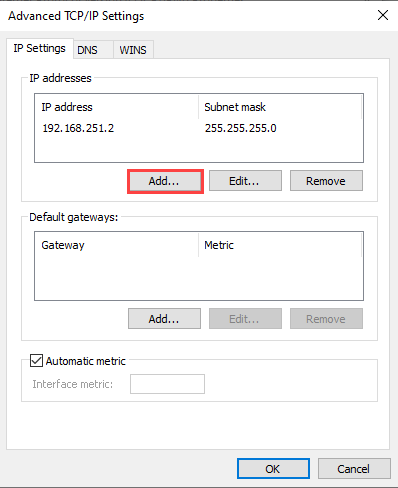
- Enter the IP address (IP address range for Desigo Room Automation).
Enter the Subnet mask (for example, 255.255.255.0).
Click Add.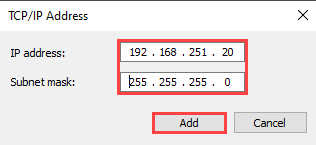
- Confirm by clicking OK and close the dialog box.
- Continue clicking OK until all the dialog boxes are closed.
- Another fixed IP address is assigned.