Creating rails
1. Add rails
- Go to Building > Building Structure.
- Right-click the automation station and select Go to engineering.
- Open the I/O configuration task.
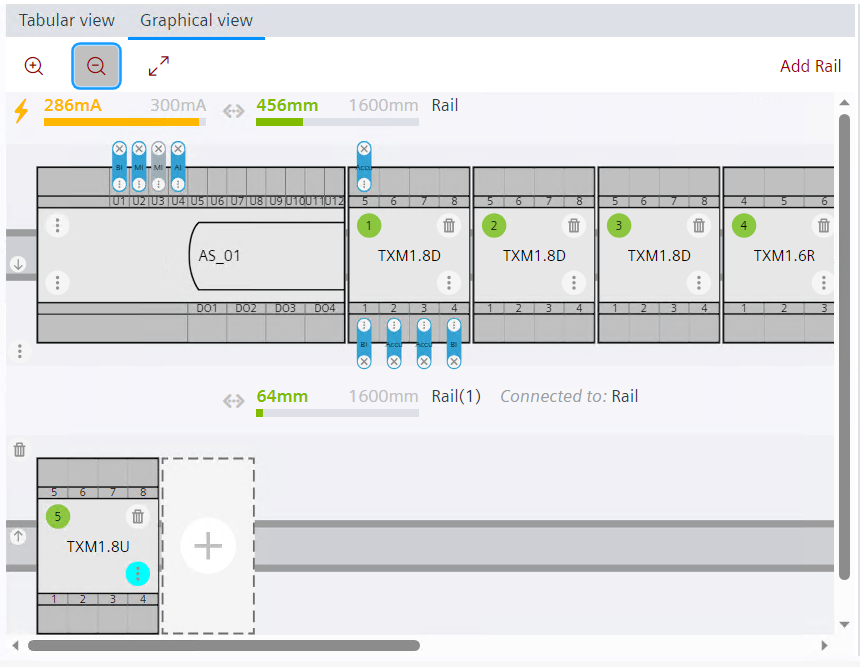
- Click the Graphical view tab.
- By default, a main rail is already added including the used PXC device.
- To add a local rail or decentralized rail, click Add rail.
- The Add rail dialog box opens.
- Enter the rail description, name, and maximum length.
- In the Type field, select Local rail to add a local rail or Decentralized rail to add a decentralized rail.
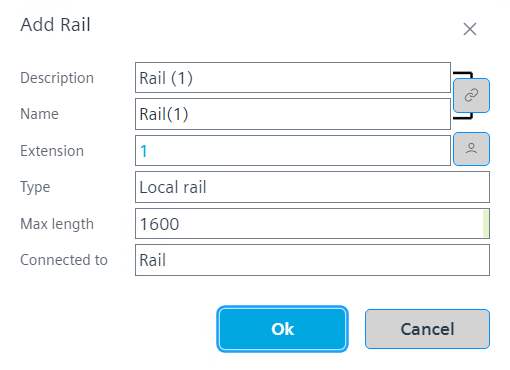
- In the Connected To field, you can define how the rails are connected between each other. Local rails can be connected to any rail. Decentralized rail can be connected to main or other decentralized rails.
- Click OK.
- A rail is added. For decentralized rails, the tool automatically adds an own power supply to the new rail. It also creates bus interface modules TXA1.IBE on both the decentralized rail and the main rail.
Go to the Settings > Device defaults if you want to change the default type of the automatically added power supplies for decentralized rails.
2. Add module or accessory to rails
There is no need to manually create modules if you use Assign data points procedure (see step 3. Assign all data points).
- In the graphical view, click on the plus sign to open the list of available modules and accessories.
- The Add moduledialog box opens.
- With Add module, you can also add additional power supply if needed.
- Select the type and address of the module.
- Add the power supply module to the main rail and local rail.
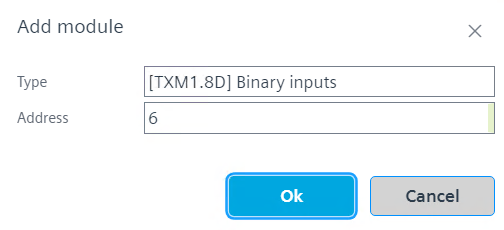
- Click OK.
- A module is added to the selected rail.
As the modules are added to the rails, the length will be calculated automatically and displayed before the graphical view of every rail. Local rails do not have power supply calculation of their own. Any added power supply to local rails are part of the connected main rail or decentralized rail.

When calculating the required amount of power, total consumption is always estimated. After assigning the effective data points/signal type, the required power consumption may be reduced.
Power consumption of the TX-IO’s
3. Assign all data points
See Creating plants and I/O data points on how to create I/O data points.
Either assign data points one-by-one by drag and drop the point to the module (see video on top of this section) or use Assign data points procedure (see below).
- Go to the Plants navigation view.
- You can see a list of data points.
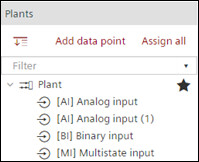
- To assign all data points to the modules in the rails, click Assign all in the Plants navigation view.
- The data points are assigned to the modules in the rails. The data points appear in blue color on the assigned rails.
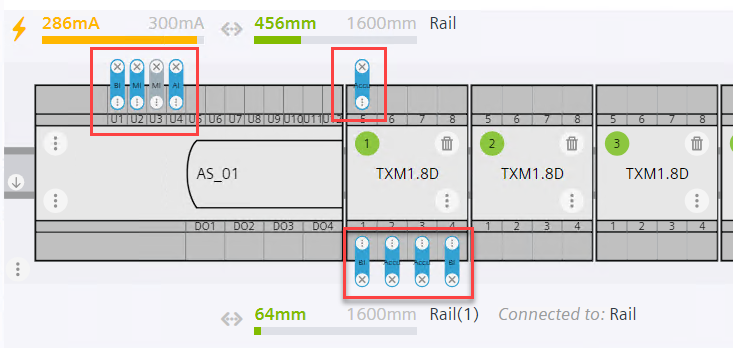
The tool automatically creates the needed TX-I/O modules if they do not exist. Go to the Settings > Device defaults to change the default module types for of the automated creation.
4. Check functionality of rails
- Rails are engineered and want to check its functionality.
- Click on the Check button on the top of the Plants navigation view.
- See the log messages in the Log view. If the rails are engineered correctly, the log displays a message as Check successful.
To get the report of the rail engineering, see Types of reports.