Manually configuring the device on premise

Depending on the device used, the dialogs may be displayed differently. For mobile devices, it is recommended to work in landscape mode.
Connecting to the device
- The ABT Site project password is known and fulfill the password policy of:
- min. 8 characters
- upper and lower case letters
- digits
- special characters
User profiles > Common settings
- Push the SVC button on the PXC for 2 seconds to activate the WLAN.
Functionality of the PXC device - The blue LED is blinking.
- The device appears in the OTHER NETWORKS section.
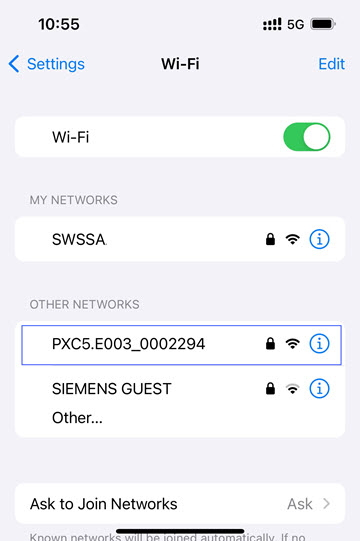
- Select the device network to establish the connection to the device.
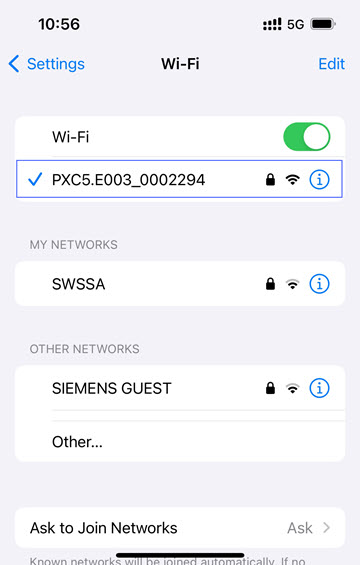
- Search and connect to the PXC’s WLAN network with your PC/tablet/smartphone (SSID will be the “hardware name_xxx”, for example, PXC5.E003_0002294).
- Password to network is the serial number printed on the PXC (S/N: xxxxxxx).
- The blue LED lights up constantly.
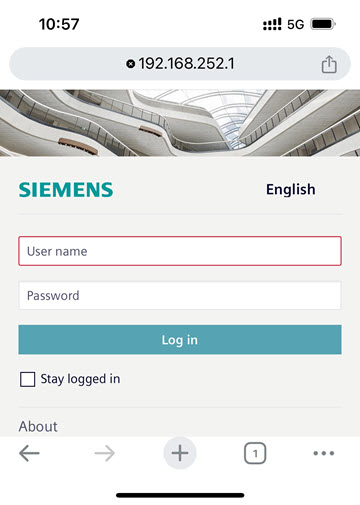
- Open a web browser and enter 192.168.252.1
- Non-secure connection information is displayed.
- By confirming the information display, the password dialog opens.
The LED states belongs to the device types:
- PXC4.Exxx, PXC5.Exxx, PXC7.Exxx
- PXG3.W100-2, PXG3.W200-2
| ||
LED device state | Connection | Check |
Off | Cloud is switched off | Cloud settings |
Flashing | Cloud not connected | Internet connection |
IP settings | ||
Ethernet Socket LEDs | ||
On | Cloud connected | OK |
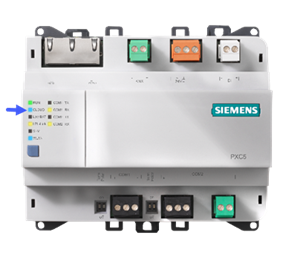
- The LED for the WLAN must light up before you can access the device with the browser.
- The LED for the Cloud lights up when the Cloud is activated.
Change the initial device password
- The ABT Site project password is known and fulfill the password policy of:
- min. 8 characters
- upper and lower case letters
- digits
- special characters
User profiles > Common settings
- In the User name field, enter Administrator.
- In the Password field, enter the default password OneBT used in all devices.
- Select Log in.
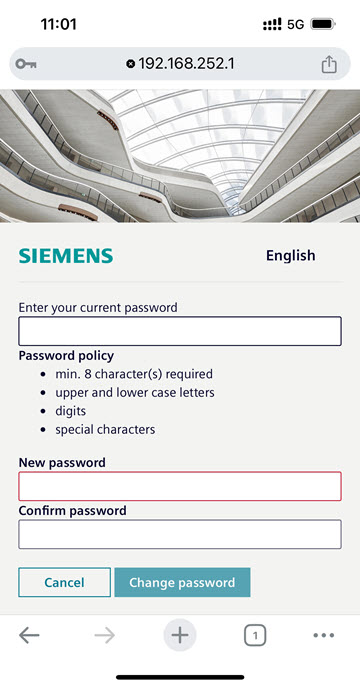
- The password section opens
- In the Enter your current password field, enter the default password OneBT used in all devices.
- In the New password field, enter the ABT Site project password.
- In the Confirm password field, enter the ABT Site project password again.
- Select Change password.
- The device password is changed to the ABT Site project password.
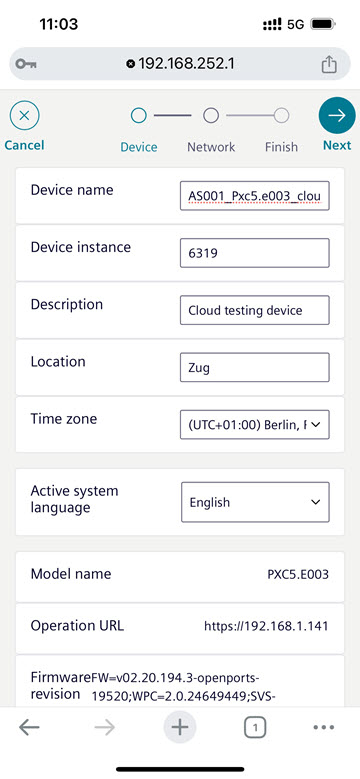
Entering the device settings
- The Device dialog is open.
- In the Device name field, enter the device name.
- Copy the information to the Excel table for the data exchange with Siemens.
- In the Device instance field, enter the device instance ID.
- Copy the information to the Excel table for the data exchange with Siemens.
- In the Description field, enter the device description.
- In the Location field, enter the location of the project.
- From the Serial number field, copy the information to the Excel table for the data exchange with Siemens.
- Select Next.
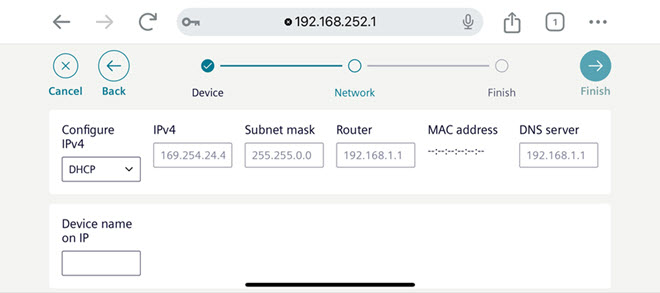
Entering the network settings
- The Network dialog is open.
- In the Configure IPv4 drop-down list, select Manual.
- In the Device name on IP drop-down list, select the device name.
- In the IPv4 field, enter the IP address for this device.
- Copy the information to the Excel table for the data exchange with Siemens.
- Select Finish.
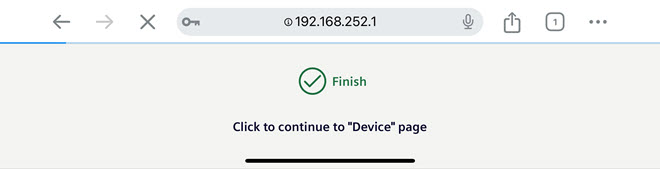
- Select .
- The configuration is finished.
Activating the Cloud settings
- Select the Object view tab.
- Select Device > Infrastructure.
- Select Network port for Cloud.
- In the Enable connectivity drop-down list, select Yes.
- Select .
- In the Enable BACnet tunnel drop-down list, select Yes.
- Select .
- From the Activation key field, copy the information to the Excel table for the data exchange with Siemens.
- Select Activate.
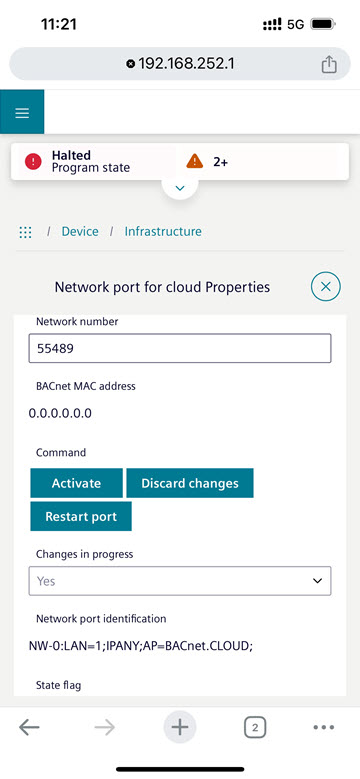
- In the Network port for Cloud row, the status changes to
Connected.