Workflow when RDG2 devices must be created first
For the graphical representation of a RDG2 device in Desigo CC, the data points for the Logical View must be correctly assigned to the RDG2 devices.
1. Create the first room and a RDG2 device
- The RDG2 devices are not created.
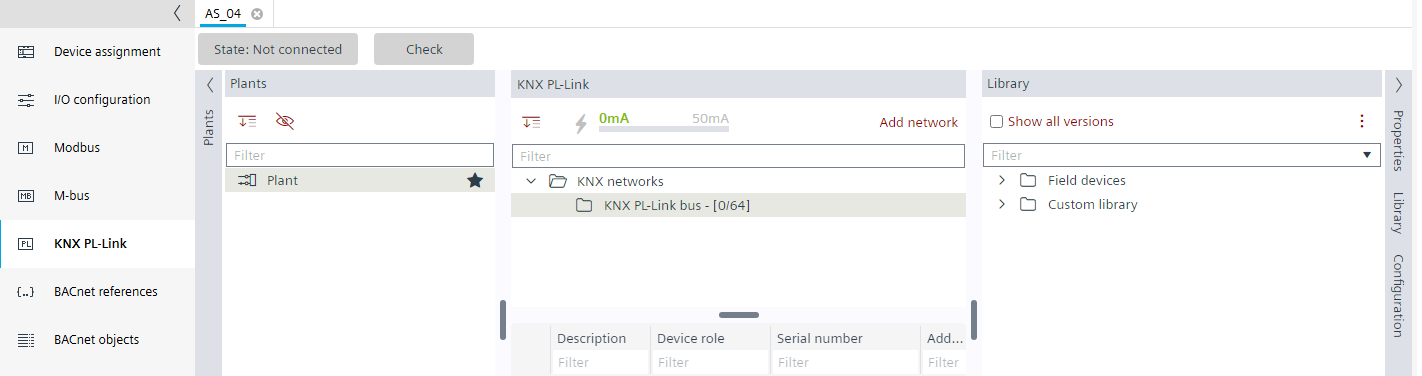
- Open the KNX PL-Link task.
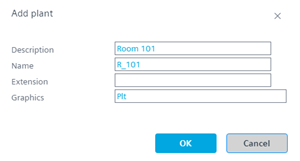
- In the Plants navigation view, right-click and select Add plant.
- In the Add plant dialog box, enter a name and a description, for example:
- Room 101
- R_101
- Click OK.
- Select the Library view on the right.
- From the Field devices > KNX PL-Link folder, drag a RDG2 device from the library to the new created plant (room).
Adding and renaming RDG2 manager device - Right-click the device
 and select Rename.
 - Enter the name for the device, for example, Room 101.
- Click OK.
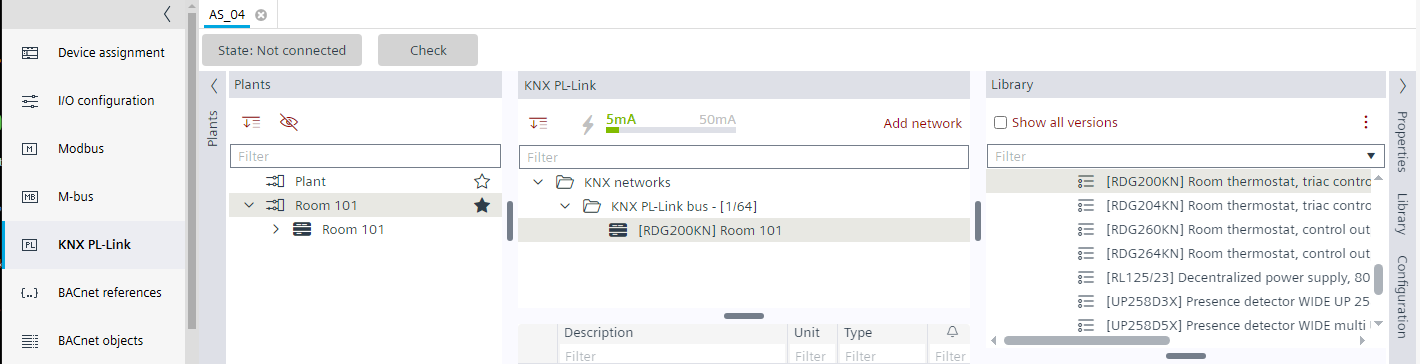
- The RDG2 device is created and assigned to the selected Room
 folder.
 - Select the Configuration tab on the right and configure the RDG2 device.
Configuring the RDG2 application type
Configuring the RDG2 heating/cooling coil demand with zones
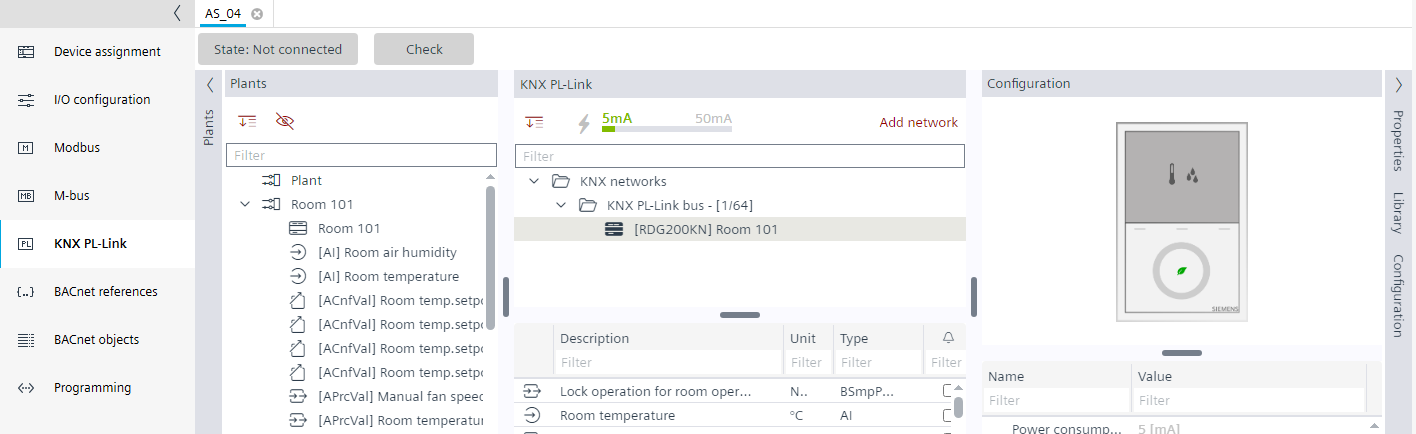
2. Move the data point to the plant (room)
- In the Plants navigation view, select all the data points below the Room .
- Drag all the data points to the Room folder.
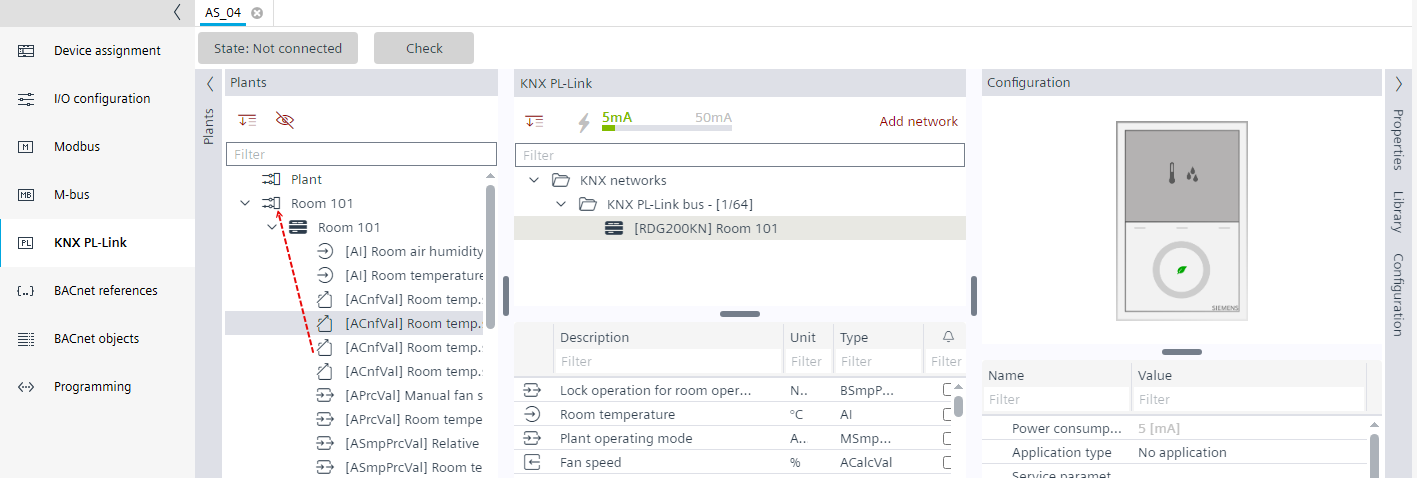
- The data points are moved below the plant. In a room with only one device, the symbol changes to white. If there are subordinate devices, the symbol remains black.
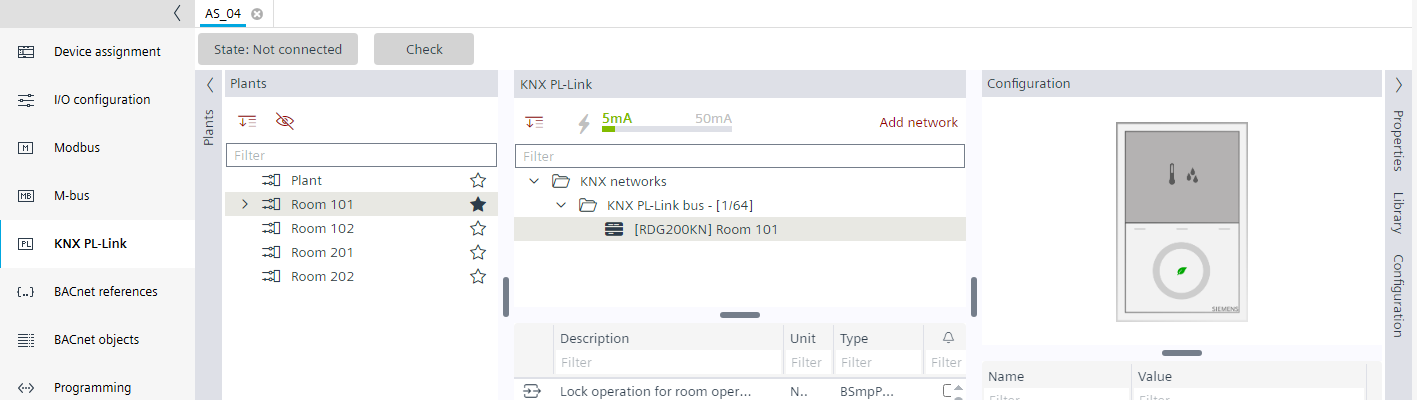
3. Create the rooms 2 - n
- In the Plants navigation view, select Plant.
- Right-click and select Add plant.
- In the Add plant dialog box, enter a name and a description.
4. Duplicate a RDG2 device
- The source RDG2 device is configured.
- In the KNX PL-Link area, select the RDG2 device.
- Right-click the device and select Duplicate.
- All settings and the associated control program are duplicated.
- Right-click the device and select Rename.
- Enter the name for the device, for example, Room 102.
- Click OK.
- Drag the room to the desired plant .
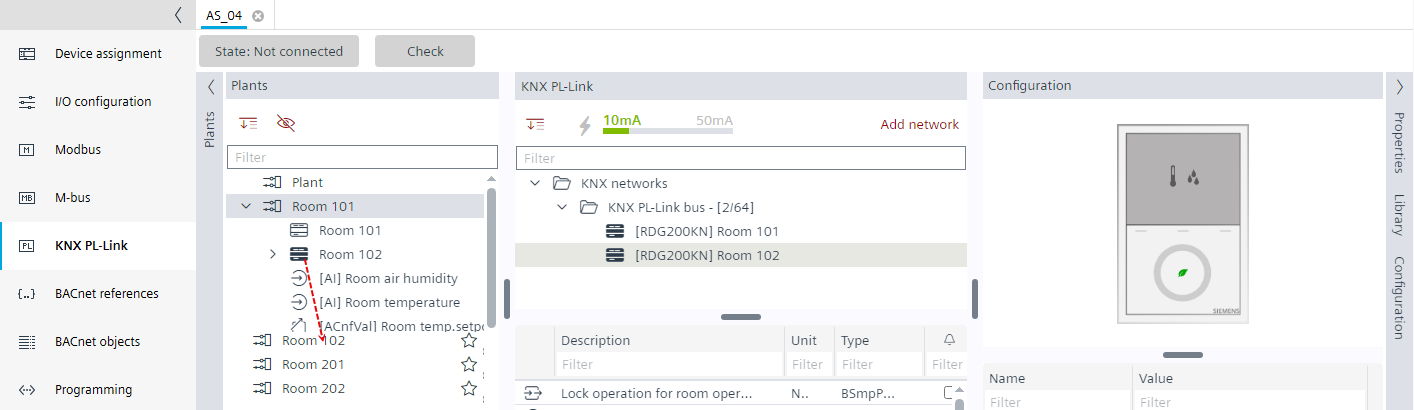
- Move the data points described in the workflow step 2 (Move the data point to the plant (room)).
5. Assign the application type to the folder
The application can already be assigned when creating a plant .
- In the Plants navigation view, select the Room folder .
- Select the Properties tab on the right.
- The Properties view shows the plant properties.
- Select the Node subtype property.
- Enter the application abbreviation, for example, RDG_RCG_2PP_H.
Desigo CC graphics mapping for RDG2 devices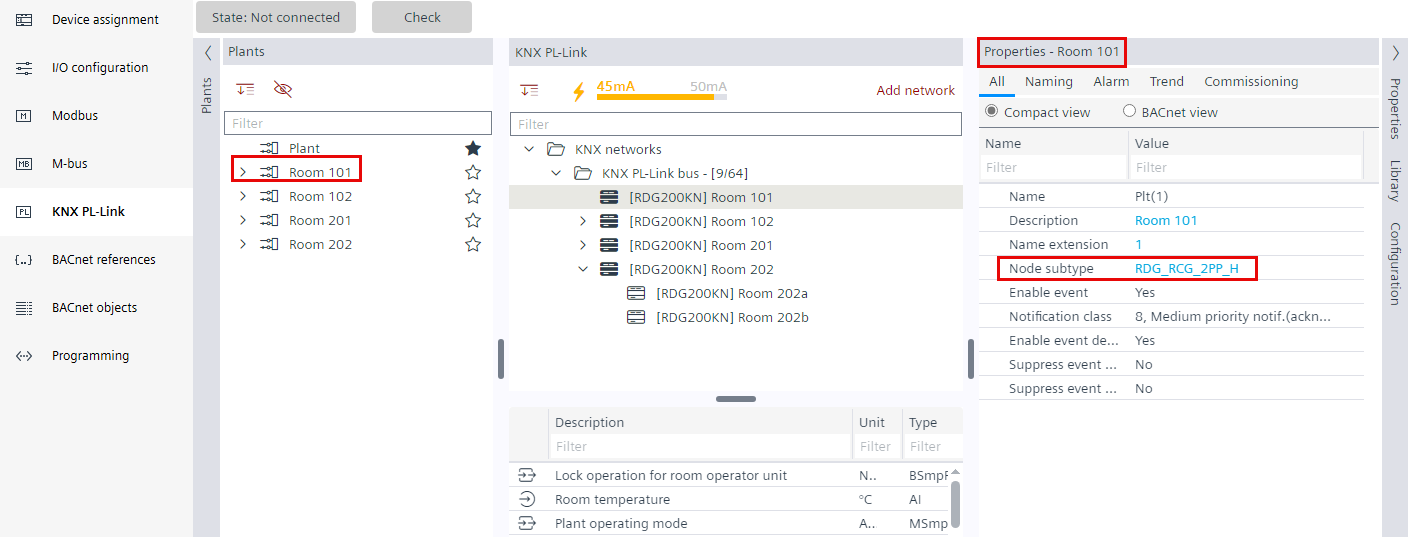
- The room is configured for the Logical View in Desigo CC.
6. Setup the building structure for the rooms
- Go to Building > Building structure.
- Select Show rooms & plants
 .
. - The rooms are displayed in a flat hierarchy.
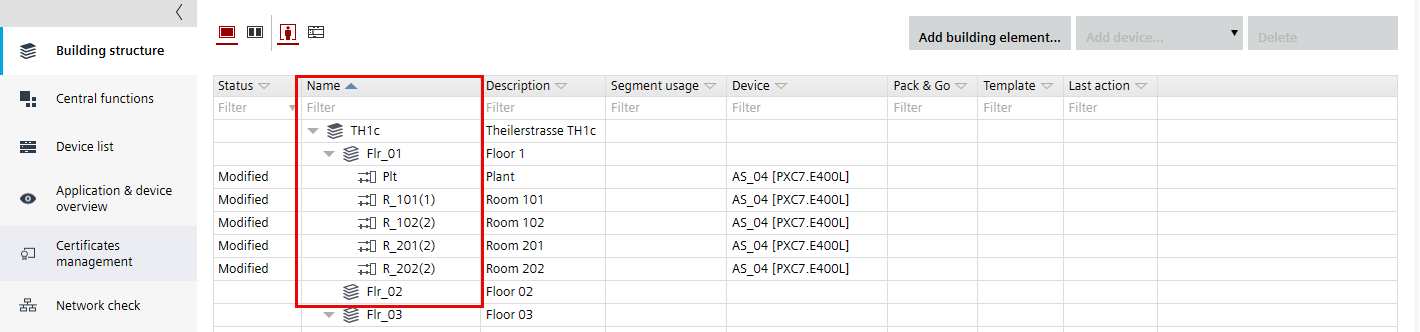
- Drag the rooms to the correct building hierarchy.
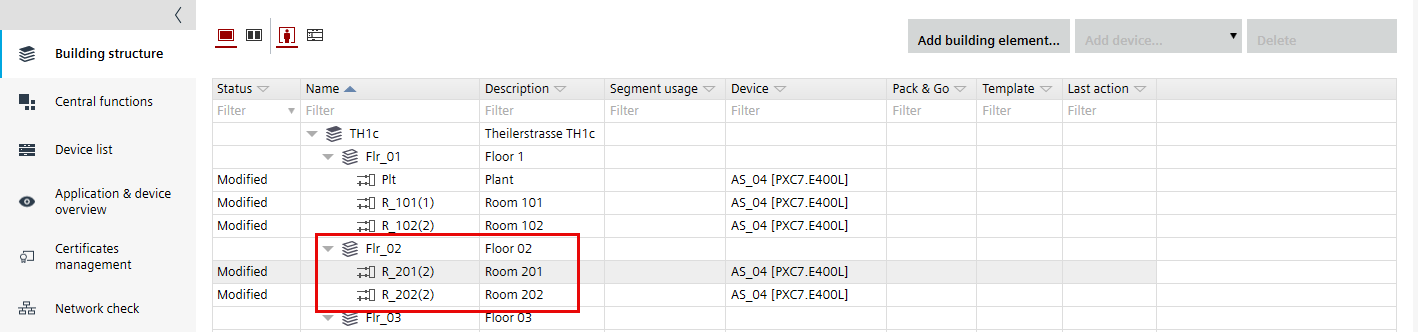
Note: The plant symbol is also displayed for a room. The room symbol is not supported in this version.
Supported application abbreviations for RDG2 devices
Desigo CC graphics mapping for RDG2 devices